Sign up
Create a free account at app.sapari.io/signup. Email and password works, or sign in with Google or GitHub.
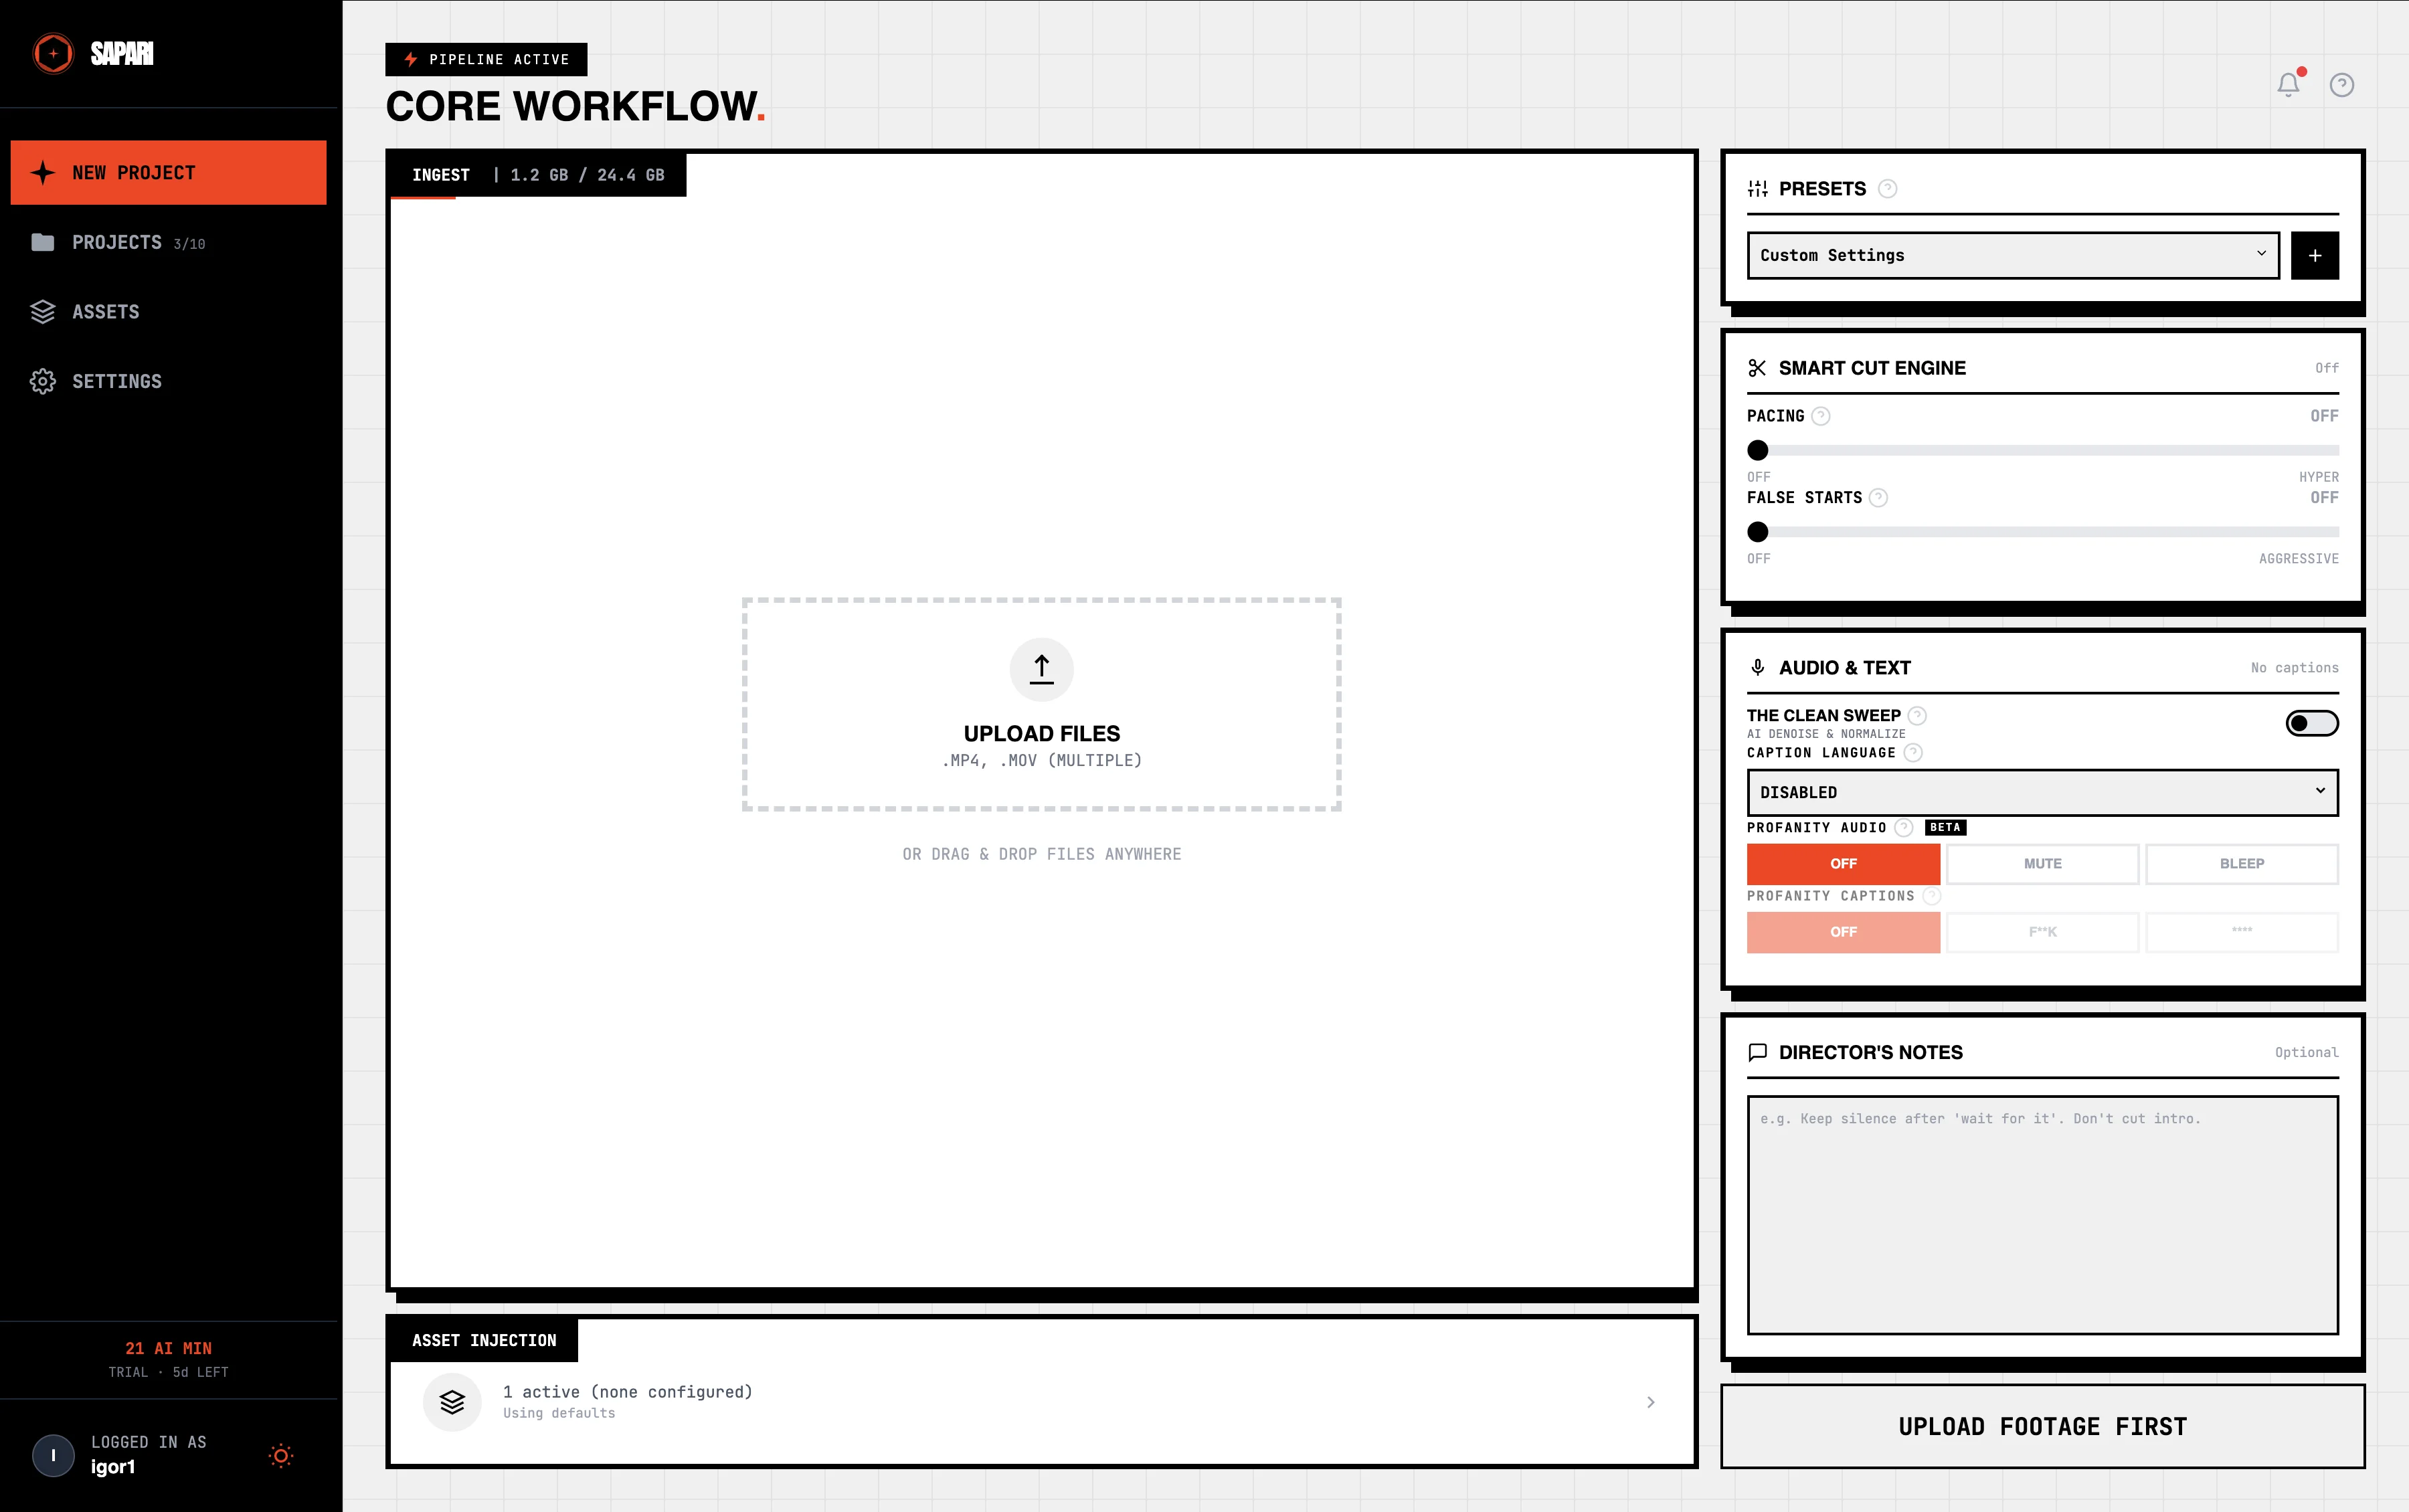
Create a project, upload a video
A project is a container for one logical edit. Usually that's one recording, but it can hold multiple clips that get stitched together — useful when you have an intro, a main segment, and an outro.
Click New Project, then drag a video onto the upload zone. Supported: MP4, MOV, MKV, WebM. On Viral tier, you can paste a YouTube URL instead.
Sapari extracts the audio, generates a scrub preview, and gets the clip ready for analysis. You'll see Ready next to the clip when it's done. On a typical 30-minute recording this takes about a minute.
Pick what the AI should do
Before running analysis, decide what you want from the AI on this pass. None of these are required — leave everything off and Sapari just transcribes the audio for captions and gives you an empty timeline to edit by hand. The most common starting point: turn on captions and let the silence/false-start defaults do their thing.
For the full reference on every AI option (silence sensitivity, false-start confidence, censorship, director notes), see AI features.
Run analysis
Click Run Analysis. Time to complete is roughly 0.3× the recording length — a 30-minute video takes about ten minutes. You can watch progress, switch tabs, or close the browser; you'll get an in-app notification when it's done.
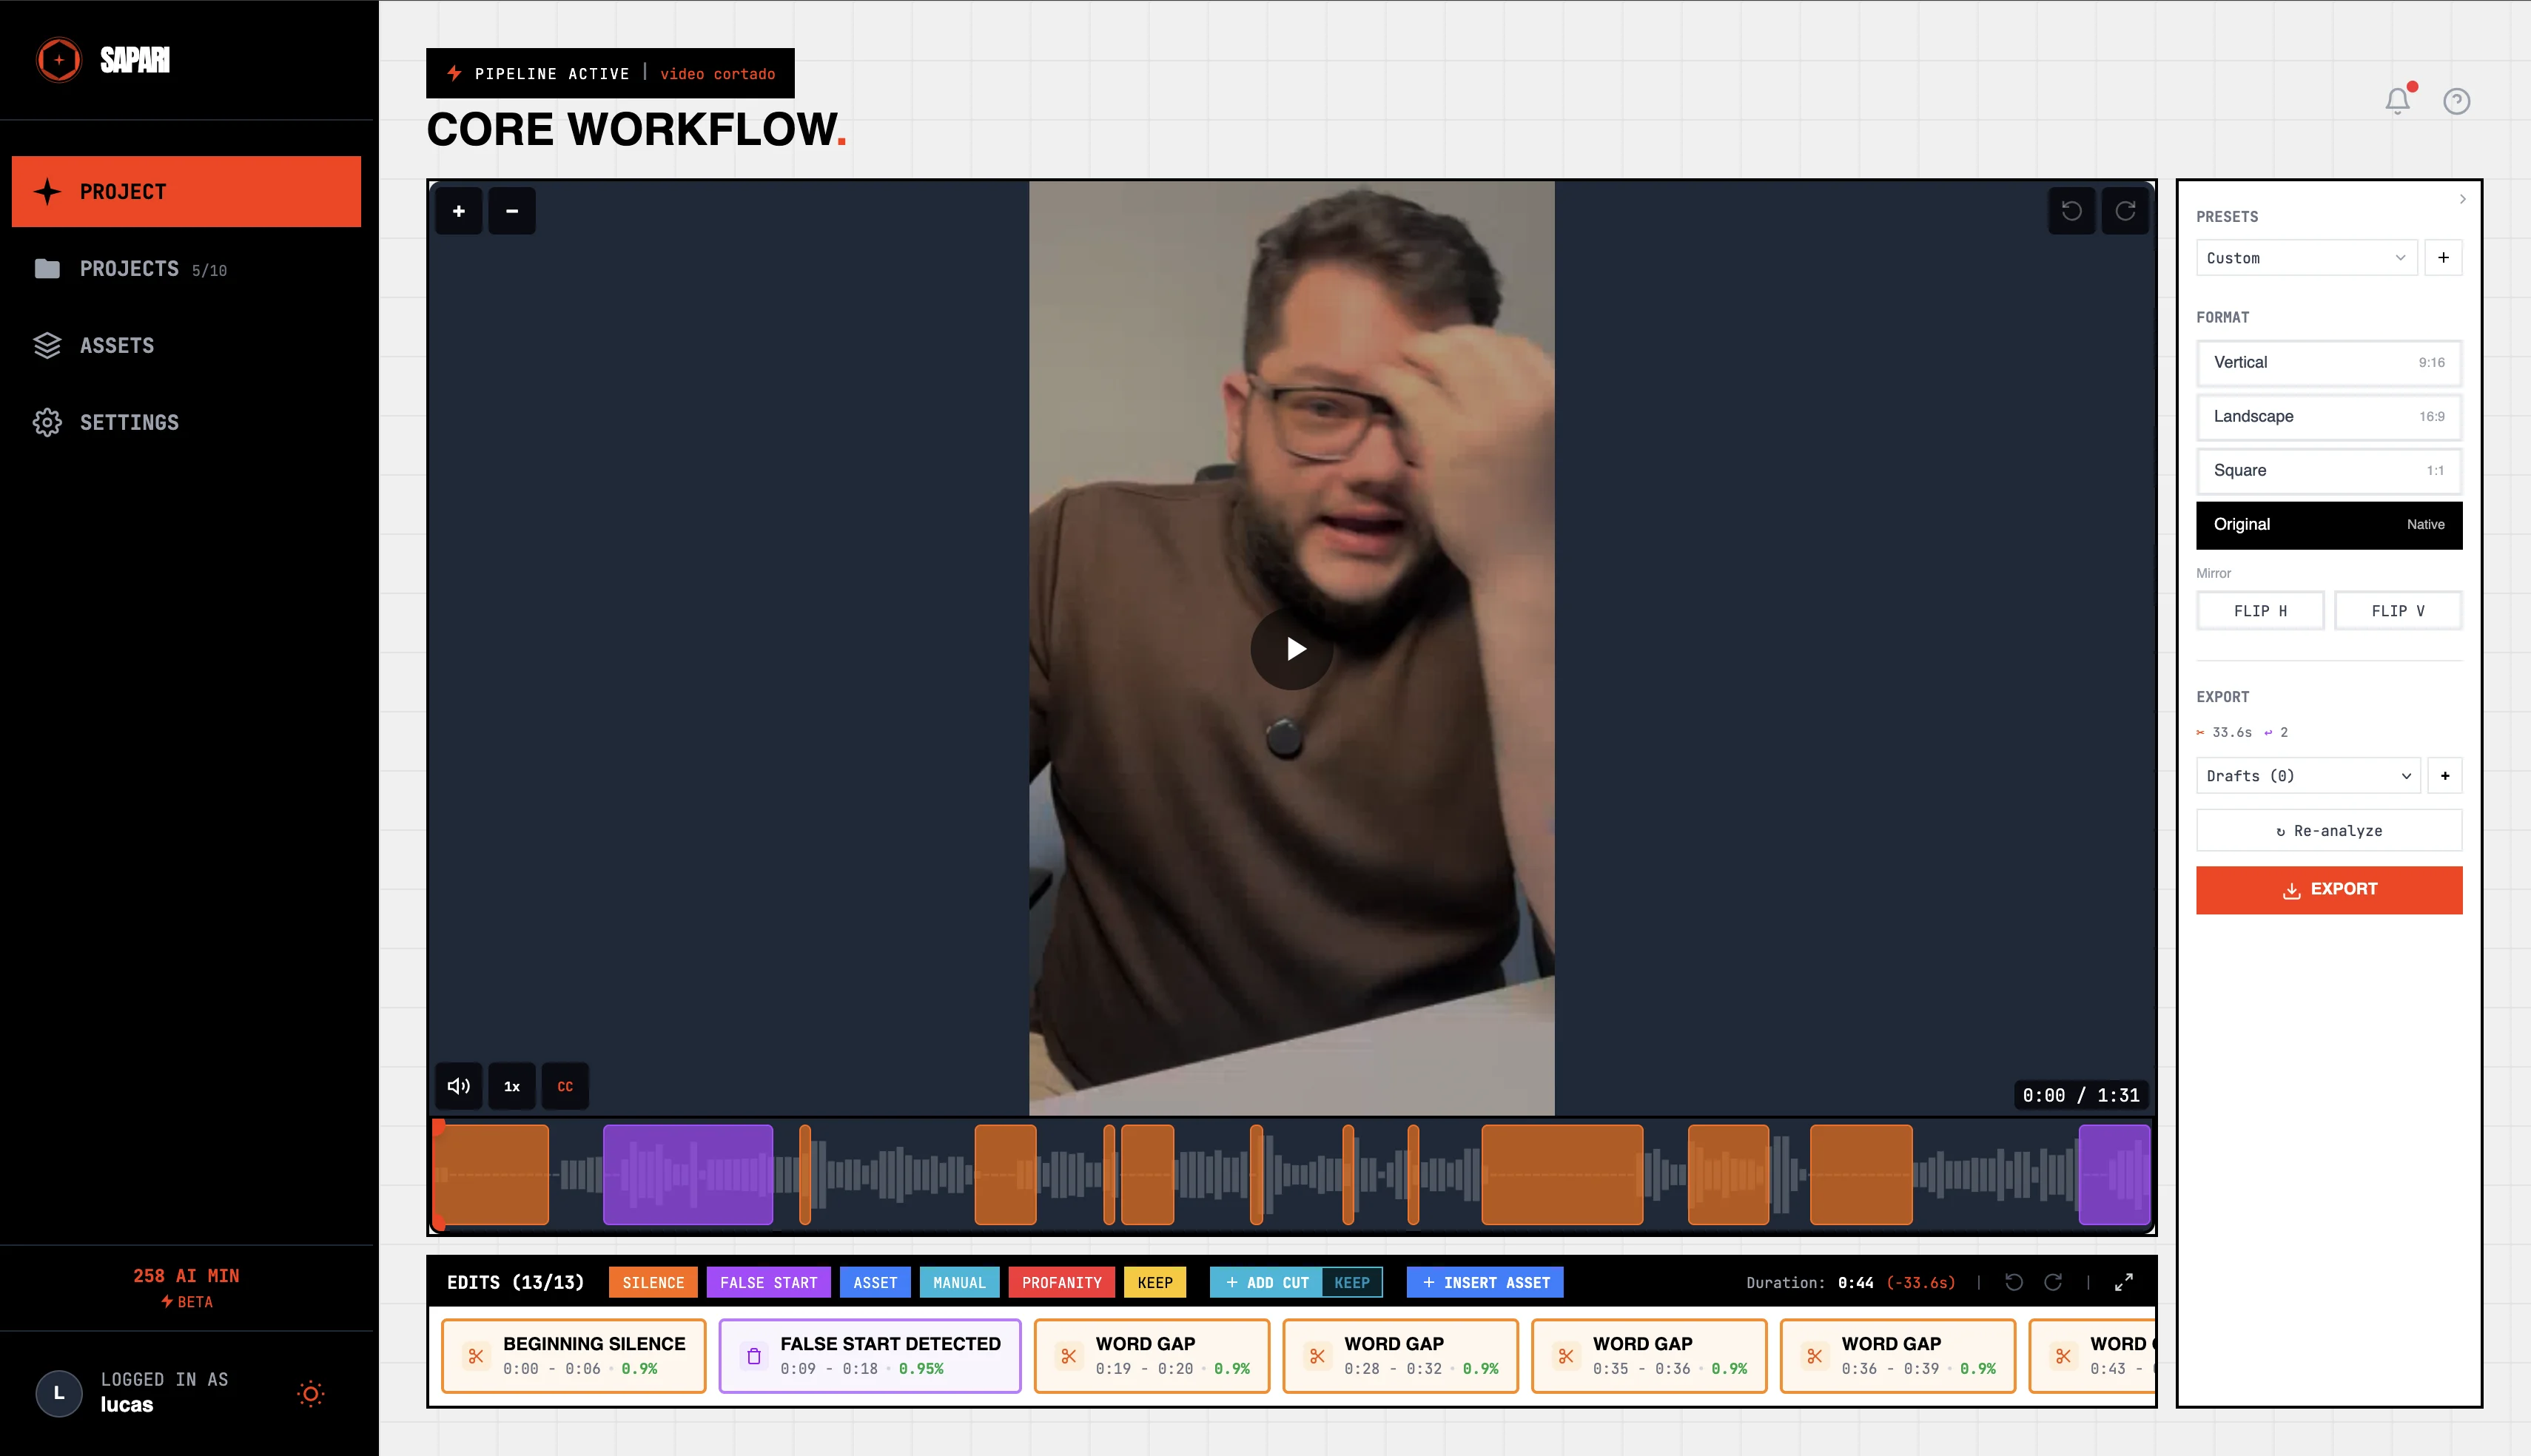
Review the cards
Every AI decision lands as a colored card on the timeline. Click any card to keep it, dismiss it, or drag the boundaries to fine-tune. Nothing renders without your sign-off.
On mobile, the cards stack into a swipe-through review — accept or dismiss with thumb-zone buttons, haptic feedback fires on every action so you can pace through 50+ cards without looking up. On desktop, the timeline shows everything at once with cards on lanes — silence cuts, false-start flags, captions, assets. Click anything to inspect.
Export
Open the export panel. The aspect ratio you pick decides what platform you're targeting — 16:9 for YouTube, 9:16 for TikTok / Reels / Shorts, 1:1 for LinkedIn / Instagram. Same edit, three frames.
Click Export. The render queues, you get notified when it's ready, and you download or share the link. Renders are unlimited — re-export with different settings as many times as you want.
That's the whole loop. From here, the rest of the docs go deeper: what each AI feature does, how the timeline editor works, assets and B-roll, exports and formats. Anything unclear? Discord.